
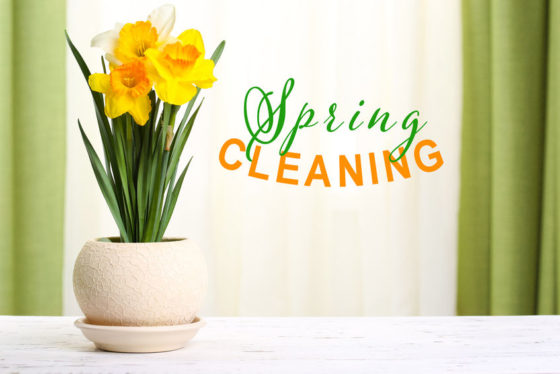
Biofriendly Way to Kickstart Your Spring Cleaning
Copyright: belchonock / 123RF Stock Photo
Spring is traditionally the time of year when people get the urge to not only air out, but thoroughly clean, their homes. Think about it…after having your home closed up during the cold months of winter, spring gives you a reason and opportunity to get a “fresh start.” Even if you’ve been trying to avoid doing so, we’ve got a biofriendly way to help you kickstart your spring cleaning.
Don’t worry, the checklist steps we list below are pretty simple. Give it a try and you will see, just how easy spring cleaning can be. (Please excuse the cheesy rhyme…lol.)
Starting with the Spring Cleaning Basics
First things first, we’ve got a few spring cleaning basics. You’ll want to do these actions right off the bat.
- Open up your windows and/or doors to air out your home. Having your house closed up during the cold winter months only contributes to indoor air pollution. Airing out your home helps immediately improve indoor air quality. It also helps get rid of any unwanted odors.
- Bring in a few plants. Plants can be used to help brighten up a home, as well as detoxify and purify the indoor air.
- Make your own organic, non-toxic cleaners. When doing spring cleaning in your home, it is counterproductive to introduce more chemicals and toxins. You are trying to rid your home of such. We recommend making some DIY cleaning products prior to getting started.
Organic, Non-Toxic Cleaners
In all honesty, it doesn’t take much to make organic, non-toxic cleaners. While you can get all complex about it, it’s actually quite simple. The following are a few natural products you can use, instead of toxic and harmful chemicals, to disinfect and clean your home. You can either use these products on their own or combined for extra-strength:
- Baking Soda: good for scrubbing, odor elimination and whitening
- Hydrogen Peroxide: good for stain removing and as a disinfectant
- Lemon (and other citrus fruits): works well for removing strains and odor elimination
- Olive Oil: a natural wood polishing agent
- Salt: perfect for scrubbing away some of the more build-on grime
- Vinegar: some refer to this as “The Super Cleaner”
- Tea tree oil: a wonderful disinfectant
- Essential oils: good for introducing a pleasant scent into your home (add into other products)
You can even use stale coffee grounds to deodorize your refrigerator. Revitalizing old, stinky sponges is easy with some cold, salt water. Clean those windows and mirrors with some vinegar, waster and crumpled up newspaper. Drains can be cleaned out and freshened up with just a little baking soda, vinegar and lemon. All you need to do is dump about 3/4 of a cup of baking soda down the drain followed by 1/2 cups or so of white vinegar. Plug the drain and let it sit for about half an hour. Then rinse it out with a pot of boiling lemon water and your’re good to go.
For more ideas like this you can check out wellnessmama.com (scroll down to her 19 tips for natural cleaning success). Want a few DIY recipes? Good Housekeeping has 9 homemade household cleaners you can make yourself.
Divide and Conquer
Now it’s time to remove some of the clutter you’ve got laying around the house. You know, stuff you don’t really need. Come on….we’ll all got stuff we don’t really have a use for anymore yet we still hang onto for one reason or another. Spring cleaning is the perfect time to “get rid” of this stuff.
Of course, when I say get rid of, I don’t necessarily mean throw away. Don’t just dump stuff in the trash out of frustration or because you’re in a hurry. Divide and conquer. Make piles. A pile of items you intend to keep (and use), a pile of items to donate to a local shelter, Goodwill or the Salvation Army, items to sell on consignment, a pile of items you can repurpose and, lastly, those which really do need to be thrown away. If you’re doing it right, your throw away pile should be the smallest of the bunch.
A couple of ideas for repurposing items you may have previously gotten rid of include: using old shirts, socks or towels for dusting or polishing wood. These are much more biofriendly than single-use dusters or paper towels. You can also revamp old clothes into new ones. A simple example is an old pair of pants into shorts or maybe a long-sleeved shirt into a short-sleeved one. The ideas are endless. Get creative.
Areas You Won’t Want to Miss
We also want to point out a few areas you won’t want to miss when doing your spring cleaning. Remember, spring cleaning is traditionally a thorough cleaning. It is not a light surface dusting or simply putting a few items away. It’s a dig in and clean out activity. So, take the time to clean out appliances like the coffee maker, dishwasher, oven, kettle, microwave, toaster, stove, washing machine, dryer, etc. These areas are often missed, but ones you really don’t want to avoid. Use the DIY cleaners you made.
Go paperless with your bills, magazines, flyers and more. This helps eliminate unnecessary waste in the future and saves paper as well. If you’ve got e-waste, make sure you recycle it properly. Many cities have e-waste events or programs residents can use to recycle their e-waste.
Need to do paint touch-ups as part of your spring cleaning? Make sure you use low-VOC paints. You don’t want to be adding in toxic or harmful chemicals into your home, particularly after doing such a great job with your cleaning.
Last tip: Make a game of spring cleaning and get the whole family involved. If you can get everyone involved, you’re more likely to have a good time doing your spring cleaning and you’ll have better luck maintaining the cleanliness of your home.

Post a comment